
Understanding your Volkswagen’s wiring diagram is crucial for troubleshooting electrical issues and performing DIY repairs. While seemingly complex, these diagrams provide a roadmap of your car’s electrical system. This guide will help you decipher the intricacies of Volkswagen Wiring Diagrams, focusing on key differences between older and newer models.
Navigating the Maze: Early vs. Late Volkswagen Wiring Diagrams
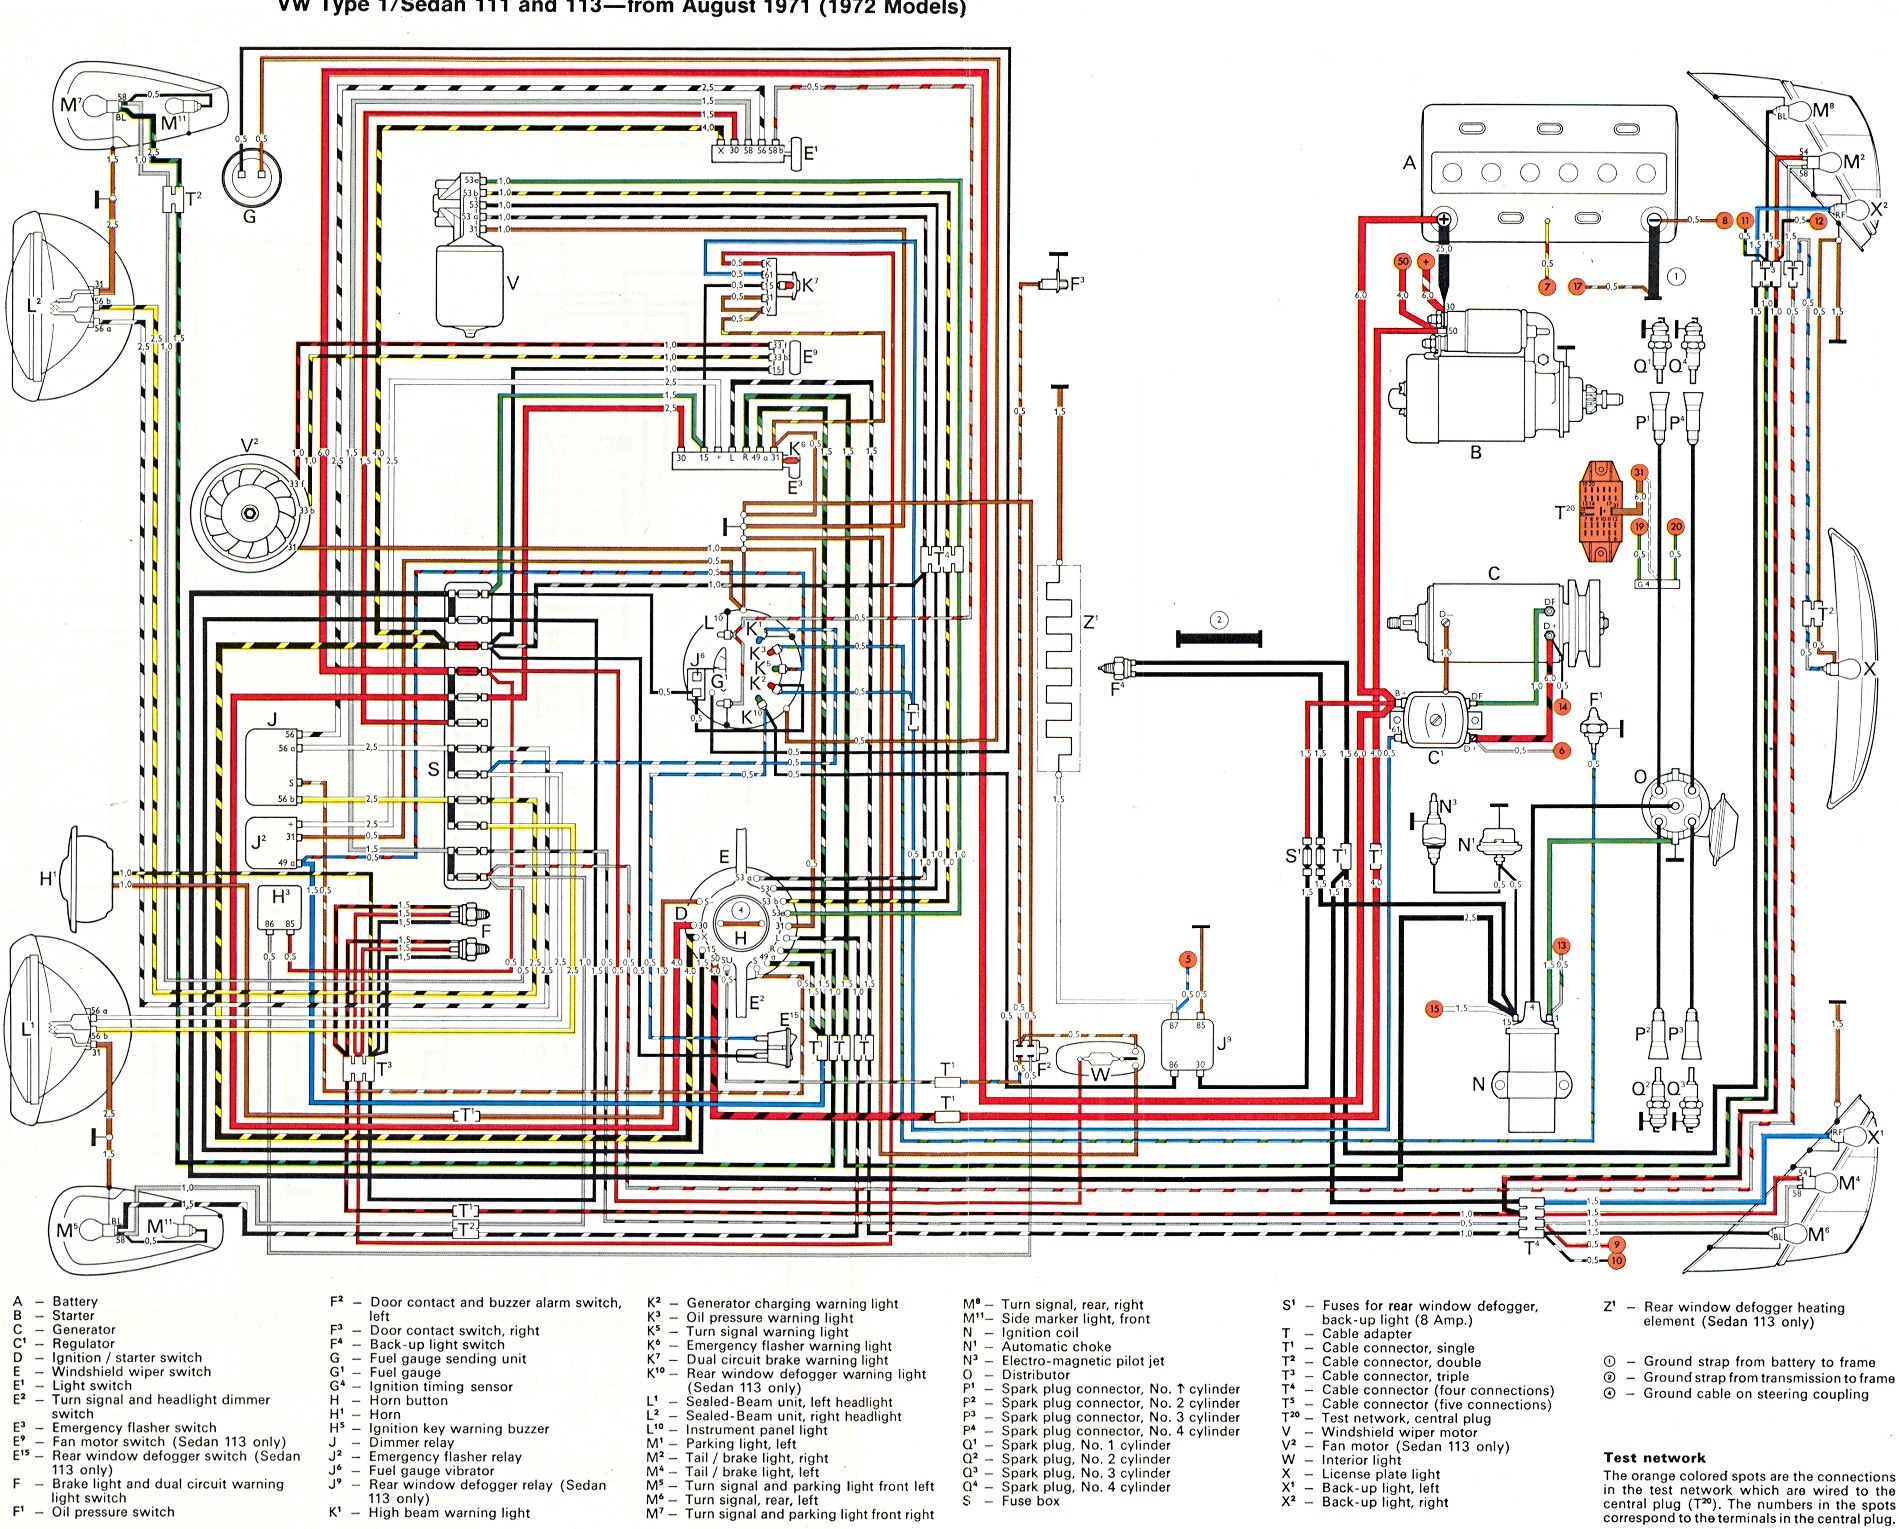
Volkswagen wiring diagrams underwent a significant shift in the early 1970s. Prior to 1973, diagrams like those found on TheSamba.com for 1972 models, adopted a spatial layout. Components were positioned on the diagram to roughly correspond with their actual location in the vehicle. For instance, headlights appeared on one end, and taillights on the other. This approach, while visually intuitive, often obscured the internal workings of switches and the flow of current.
Post-1973, Volkswagen transitioned to circuit-focused diagrams. These diagrams prioritize illustrating the flow of electricity and the internal connections within switches and relays. A 1973 Super Beetle diagram exemplifies this shift. While less visually representative of the car’s physical layout, these diagrams offer a superior understanding of circuit functionality. For example, the turn signal assembly, incorporating turn signals, dimmer switch, and horn, is represented across three distinct sections in the ’73 diagram, facilitating targeted troubleshooting. In contrast, the ’72 diagram consolidates all these wires at the speedometer/turn signal/horn/ignition switch cluster.
(1972 Volkswagen Wiring Diagram)
(1973 Volkswagen Super Beetle Wiring Diagram)
(1973 Volkswagen Wiring Diagram Key)
Deciphering the Diagram: Keys and Conventions
Understanding the key or legend is paramount to interpreting a Volkswagen wiring diagram. The key identifies the symbols used for various components (switches, relays, fuses) and often indicates their location on the diagram using grid coordinates. In later diagrams, positive current generally flows from the top, grounding at the bottom. Familiarizing yourself with the location of key components like the headlight switch, wiper switch, and flasher relay within the diagram is crucial for efficient troubleshooting. Fuses, while dispersed on the diagram, are numbered to correspond with their physical arrangement in the fuse box (from left to right, as viewed from the driver’s seat).
Fuse Box Fundamentals: Input vs. Output
A critical aspect of Volkswagen wiring is understanding the fuse box’s input and output sides. The input side receives power from the battery, often indicated by thick black lines connecting one side of multiple fuses, creating a common power source. This is often achieved with a brass bridge connecting fuse pairs. The output side connects to the various circuits protected by the fuses. Connecting an output wire to the input side, or vice versa, can bypass fuse protection and lead to potential damage. Remember, certain circuits, like the ignition coil, may not be fused.
A helpful tip for identifying the input side and fuse numbering: headlight fuses are consistently paired as 3-4 and 5-6. These pairs are always bridged on the input side. Locating these bridged pairs confirms fuse identification and distinguishes the input side.
Conclusion: Mastering Volkswagen Wiring Diagrams
While the transition from spatial to circuit-based diagrams may initially seem daunting, understanding the underlying logic and conventions unlocks the power of Volkswagen wiring diagrams. Whether you’re troubleshooting a faulty turn signal or installing a new radio, these diagrams are indispensable tools for any Volkswagen enthusiast. Remember to consult the correct diagram for your model year and utilize the key to decipher the symbols and connections. With careful study and practice, navigating the intricacies of your Volkswagen’s electrical system will become significantly easier.