Are you noticing that your nighttime drives are not as bright as they used to be? Or perhaps one of your headlights has completely stopped working? Don’t worry, you’re not alone. Headlight bulbs, like any other component of your vehicle, have a lifespan and will eventually need replacing. As your trusted auto repair experts at scantoolforcar.store, we’re here to guide you through everything you need to know about how to Replace Headlight Bulb effectively and safely at home.
Driving with dim or non-functioning headlights is not only inconvenient but also extremely dangerous, reducing visibility and increasing the risk of accidents. Before you rush to a mechanic, you should know that in many cases, replacing a headlight bulb is a straightforward DIY task that can save you time and money. This guide will walk you through the reasons why headlights fail, how to choose the right replacement bulbs, and provide a step-by-step tutorial on how to replace headlight bulb yourself. We’ll also cover common issues and troubleshooting tips to ensure your vehicle’s lighting is back to its optimal performance.
Understanding When to Replace Your Headlight Bulbs
Several factors contribute to the lifespan and eventual failure of your headlight bulbs. Recognizing these factors can help you anticipate when a replace headlight bulb might be necessary, even before it burns out completely.
-
Age: Like all light sources, headlight bulbs degrade over time. The intensity and color of the light emitted can diminish, reducing your visibility even if the bulb still illuminates. Regular use, especially driving with headlights on during the day or in poor weather, accelerates this process.
-
Temperature Fluctuations: Extreme temperatures, both hot and cold, can put stress on the delicate components inside a headlight bulb, particularly the filament. Parking your car in direct sunlight during summer heat or exposing it to freezing winter temperatures can shorten bulb life.
-
Physical Shocks and Vibrations: Driving on rough roads, encountering potholes, or even minor impacts can damage the fragile filament within halogen and incandescent bulbs. These vibrations can lead to premature bulb failure.
-
Oxidation and Corrosion: Moisture and contaminants can lead to corrosion on bulb contacts and connectors. This oxidation increases resistance, reduces electrical flow, and can cause bulbs to fail or flicker. Using dielectric grease on bulb contacts during installation can prevent this issue.
Bulb or Fuse? Diagnosing the Problem Before You Replace Headlight Bulb
Before you immediately decide to replace headlight bulb, it’s crucial to diagnose whether the issue is actually the bulb itself or a more general electrical problem, like a blown fuse. A simple way to start is by observing how many headlights are out.
If only one headlight is out, it’s highly likely that the bulb has simply burned out due to age or one of the reasons mentioned above. In this case, a replace headlight bulb is the most probable solution.
However, if both headlights fail simultaneously, the problem is less likely to be two bulbs failing at the exact same moment. This scenario often points to a more systemic electrical issue, such as a blown fuse, a faulty relay, or even a wiring problem.
Checking the Fuse Box: Your car’s fuse box is usually located under the dashboard or in the engine compartment. Consult your vehicle’s owner’s manual to locate the fuse box and identify the fuse specifically for the headlights. Visually inspect the fuse – a blown fuse will typically have a broken wire inside. Replacing a blown fuse is a simple fix, but if the fuse blows again immediately, it indicates a more serious electrical circuit problem that requires professional diagnosis.
Choosing the Right Headlight Bulb for Replacement
When it comes to replace headlight bulb, you’ll find a variety of options available in the market. Selecting the right bulb is essential for optimal visibility, safety, and longevity. Here are key factors to consider:
-
Throw Distance: This refers to how far the headlight beam projects down the road. A greater throw distance allows you to see further ahead, giving you more time to react to hazards, especially at night or in low-visibility conditions. This is a critical factor for safe driving.
-
Color Temperature: Headlight bulbs are available in different color temperatures, measured in Kelvin (K). Lower Kelvin values (around 3000K) produce a warmer, yellowish-white light, while higher Kelvin values (5000K-6000K) produce a cooler, crisper white light. Cooler white light is often preferred as it provides better contrast and clarity, especially on reflective surfaces like road markings and signs. However, excessively blue light (very high Kelvin) can actually reduce visibility in fog and rain.
-
Bulb Life: Consider the lifespan of the bulb. Some bulbs are designed for extended life, while others prioritize brightness or color temperature. Choose a bulb that balances your needs for performance and longevity.
-
Bulb Type and Size: It’s absolutely critical to choose the correct bulb type and size for your vehicle. Refer to your owner’s manual or use an online bulb lookup tool (many auto parts websites offer this) to determine the specific bulb type recommended for your car’s make and model. Using the wrong bulb type can result in poor fit, improper electrical connections, and compromised lighting performance. You can also often find the bulb size printed on the base of the old bulb itself after removal.
Genuine AutoZone Headlight Bulbs: Vehicle-specific fitment guaranteed when you check your vehicle make and model on AutoZone.com or consult with an AutoZone expert.
Exploring Different Headlight Bulb Options
The market offers various types of headlight bulbs, each with its own set of benefits. Understanding these differences will help you make an informed decision when you replace headlight bulb.
-
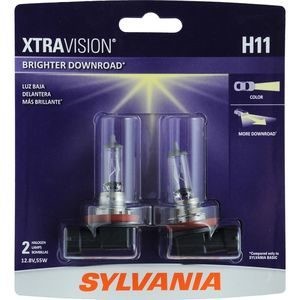
Halogen Bulbs: These are the most common type and are typically the standard bulbs installed in most vehicles from the factory. They offer a good balance of brightness, lifespan, and affordability. Options like Sylvania Basics are designed to be long-lasting and closely match factory specifications. XtraVision bulbs are designed for increased down-road visibility.
-
High-Performance Halogen Bulbs: For enhanced performance within the halogen category, consider bulbs like Silverstar and Silverstar Ultra. These bulbs offer improved down-road vision and a cooler, whiter light for better clarity. Silverstar Ultra provides the most extended down-road vision in the Sylvania halogen range.
-
High-Intensity Discharge (HID) Bulbs: HID bulbs produce a brighter and more intense light than halogen bulbs. They are often found in higher-end vehicles or as an upgrade option. They offer excellent visibility but typically require a more complex installation and may not be street legal in all areas if your vehicle did not originally come with HID headlights.
-
Light Emitting Diode (LED) Bulbs: LED headlight bulbs are becoming increasingly popular due to their energy efficiency, long lifespan, and bright, white light output. High-quality LED bulbs can offer superior performance and a modern look. However, ensure that any LED bulbs you choose are specifically designed and approved for headlight use to avoid glare issues for other drivers and to maintain legal compliance.
-
“HID-Look” Halogen Bulbs: Bulbs like ZXE are powerful halogen options designed to mimic the appearance of HID or LED systems without requiring complex conversion kits. They offer a brighter, whiter light and a more modern aesthetic while remaining street legal as halogen bulbs.
Important Note: Always replace headlight bulb with the same bulb size as your original bulbs. You can find the bulb size marked on the old bulb itself or consult your vehicle’s owner’s manual or an online parts finder.
Step-by-Step Guide: How to Replace Headlight Bulb
Now, let’s get to the practical part: how to replace headlight bulb. While specific steps might vary slightly depending on your vehicle’s make and model, the general process is quite similar for most cars. Always consult your vehicle’s repair manual for the most accurate instructions for your specific car.
Tools and Materials You’ll Need:
- New headlight bulbs (correct type and size)
- Safety gloves
- Safety goggles
- Screwdriver (possibly Phillips or flathead, depending on your vehicle)
- Ratchet and socket set (potentially, for removing headlight assembly or access panels)
- Dielectric grease (optional, but recommended for preventing corrosion)
Essential Tools for Headlight Bulb Replacement: A basic screwdriver and possibly a ratchet set are often all you need for a successful headlight bulb replacement.
Step-by-Step Instructions:
1. Safety First: Before you begin, ensure your vehicle’s engine is off, and the parking brake is engaged. Put on your safety gloves and goggles to protect your hands and eyes.
Prioritize Safety: Always wear safety gloves and goggles when you replace headlight bulb to protect yourself from bulb fragments and sharp edges.
2. Replace Bulbs in Pairs (Recommended): Even if only one bulb is burnt out, it’s highly recommended to replace headlight bulb in pairs. The other bulb is likely nearing the end of its lifespan as well, and replacing both at the same time ensures even lighting and saves you the hassle of repeating the process soon.
3. Identify High and Low Beam Placement: Determine whether your vehicle uses separate bulbs for high and low beams or a single bulb for both. If there are two bulbs, typically the low beam bulb is located on the outer side of the headlight assembly, and the high beam bulb is on the inner side. Consult your owner’s manual or a repair guide for your specific vehicle to confirm.
4. Accessing the Headlight Bulb: Access methods vary significantly between vehicles. Common access points include:
* **Behind the Headlight Assembly:** Some vehicles have easily accessible headlight assemblies that can be removed by unscrewing a few bolts.  Once removed, you can often access the bulbs from the back of the assembly.

* **Through the Wheel Well:**  In some cases, you might need to access the headlight bulb through the wheel well. This usually involves turning the steering wheel to full lock, removing a portion of the wheel well liner, and reaching behind the headlight housing.

* **From Under the Hood (Limited Access):** Some vehicles allow access from under the hood, but space might be limited. You might need to remove components like air filter housings, coolant reservoirs, or even the battery to gain sufficient access.
5. Disconnect the Electrical Connector: Once you have access to the back of the headlight bulb, locate the electrical connector. There’s usually a clip or tab that needs to be pressed or released to disconnect the connector from the bulb. A small pocket screwdriver can be helpful for releasing stiff clips.
6. Remove the Old Bulb: After disconnecting the connector, remove the old bulb. Most bulbs are held in place by a twist-lock mechanism. Gently grasp the bulb base and turn it counter-clockwise (usually about a quarter turn). When the tabs align, you should be able to pull the bulb straight out.
7. Install the New Bulb: Take the new bulb and align the tabs on its base with the corresponding slots in the headlight housing. Push the bulb in and turn it clockwise until it clicks into place. Avoid touching the glass portion of the new bulb with your bare fingers, as oils from your skin can shorten bulb life. If you accidentally touch the bulb, clean it with rubbing alcohol.
8. Reconnect the Electrical Connector: Reconnect the electrical connector to the new bulb, ensuring it clicks securely into place. Apply a small amount of dielectric grease to the bulb contacts before reconnecting to prevent corrosion.
9. Reassemble and Test: If you removed any components to access the bulb (like headlight assembly, wheel well liner, or other parts), reassemble them in reverse order. Once everything is back in place, turn on your vehicle’s headlights and test both low and high beams to ensure the new bulb is working correctly.
10. Repeat on the Other Side: If you are replacing bulbs in pairs, repeat steps 4-9 on the other headlight assembly.
Troubleshooting After Headlight Bulb Replacement
If you replace headlight bulb and it still doesn’t work, don’t panic. Here are a few troubleshooting steps:
-
Check the Fuse Again: Even if you checked the fuse earlier, it’s worth re-checking it after replacing the bulb, especially if both headlights still don’t work. A short circuit or electrical surge could have blown the fuse again.
-
Inspect the Bulb Connector: Ensure the electrical connector is securely attached to the bulb and that the contacts are clean and free of corrosion.
-
Wiring Issues: If the fuse is good and the connector is secure, but the headlight still doesn’t work, there might be a wiring problem, such as a broken wire or a poor ground connection. This type of issue might require professional electrical diagnosis.
-
Faulty Switch or Relay: In rare cases, a problem could lie with the headlight switch itself or the headlight relay. These are less common causes but are possibilities if other troubleshooting steps don’t resolve the issue.
If you are uncomfortable diagnosing electrical problems or if the issue persists after checking these basic steps, it’s best to seek professional help from a qualified mechanic or an auto electrical specialist.
Conclusion: DIY Headlight Bulb Replacement for Safer Driving
Knowing how to replace headlight bulb is a valuable skill for any car owner. It’s a relatively simple maintenance task that can significantly improve your driving safety and save you money on professional mechanic fees. By following this comprehensive guide, you can confidently tackle headlight bulb replacement yourself, ensuring clear visibility and safer journeys on the road. Remember to always prioritize safety, choose the right bulbs, and don’t hesitate to seek professional help if needed. Drive safely!