
Imagine the ease of arriving home and, with a simple press of a button in your car, your gate smoothly opens, welcoming you in. Programming your gate opener to work directly from your car is not just a luxury; it’s a significant upgrade in convenience and security for modern living. This guide will walk you through understanding and implementing this seamless integration, ensuring you can effortlessly control your gate from the comfort of your vehicle.
Understanding Gate Remote Programming Basics
Before diving into the specifics of integrating your gate opener with your car, it’s crucial to grasp the fundamental principles of gate remote programming. At its core, this process involves establishing communication between two key components: the receiver unit and the remote transmitter. The receiver unit, typically installed near your gate or within the gate operator itself, is the device that listens for signals. Conversely, the remote transmitter, which you hold in your hand or integrate into your car, sends out these signals. Successful gate remote programming hinges on configuring these devices to speak the same language, ensuring reliable and secure operation.
The beauty of modern gate remote programming lies in its ability to create a secure link. When programmed correctly, your remote becomes a unique key, authorized to activate your gate. This not only offers unparalleled convenience but also bolsters your property’s security by preventing unauthorized access.
Why Program Your Gate Remote for Car Integration?
The benefits of programming your gate remote, especially for in-car use, extend far beyond mere convenience. Think about those rainy days when fumbling for a separate gate remote is anything but pleasant. Integrating your gate opener with your car eliminates this hassle, allowing you to operate your gate without taking your hands off the wheel or rolling down your window.
Beyond convenience, programming your gate remote offers significant security advantages. By setting unique codes, you ensure that only your programmed remote can activate your gate, greatly reducing the risk of unauthorized entry. This personalized access control is a cornerstone of modern home security systems.
Furthermore, many gate remote systems offer advanced features that become even more powerful when integrated with your car. Features like opening and closing delays can be incredibly useful, especially if you have a long driveway. Code restrictions add another layer of security, allowing you to manage access based on time or usage.
It’s also worth noting that gate remote programming isn’t a static process. Life changes, and so might your access needs. Whether you’re adding a new driver to your household or upgrading your gate system, understanding how to reprogram your remote – and integrate it with your car – gives you the flexibility to adapt to these changes with confidence.
Essential Tools for Gate Remote Programming
Before you embark on programming your gate remote, gathering the right tools will streamline the process. While the specifics can vary slightly depending on your gate and remote model, a few common tools are typically required. You’ll likely need a screwdriver to access the receiver unit or battery compartment. A ladder might be necessary if your receiver unit is positioned high up, such as for garage door openers. New batteries are essential if your remote is older or if you suspect battery depletion might be an issue. Crucially, keep your user manual for both your gate opener and car handy, as these documents are your primary guides for specific instructions.
In some cases, you might encounter gate remotes with more specialized programming needs. Certain models may require a programming adapter or even a specific programming device to establish a connection with the receiver unit. Your user manual will be your best resource for identifying if any additional tools are needed.
Having all the necessary tools prepared before you begin programming is more than just good practice—it’s a time-saver and a frustration-reducer. Taking a few minutes to gather these items and, importantly, to read through your user manuals, sets the stage for a successful and efficient programming experience. Familiarizing yourself with the steps and potential challenges beforehand can make the entire process significantly smoother.
Step-by-Step Guide to Program Your Gate Remote for Car Integration
Now that you’re equipped with the foundational knowledge and the necessary tools, let’s move into the practical steps of programming your gate remote, with a focus on integrating it into your car. While the initial steps might involve programming the remote to the gate system itself, the ultimate goal here is seamless car integration.
Identifying Your Gate Remote Model
The very first step, and one that cannot be overlooked, is identifying your specific gate remote model. Programming methods are not universal; they vary significantly between models and manufacturers. Your user manual is the first place to look for this information. Alternatively, the manufacturer’s website is often a reliable resource. Knowing your model number ensures you’re using the correct programming instructions, saving you time and preventing potential frustration.
If you’re having trouble identifying your remote model, or if you’ve misplaced your manual, don’t worry. Many online resources can help, and as a last resort, you can email us a picture of your existing remote. Our experts can often identify the model and guide you to a suitable replacement or the correct programming procedure.
Once you’ve confidently identified your gate remote model, you’re ready to proceed with the programming process, tailored to your specific device and integration needs. Remember, accurate model identification is the key to a smooth and successful setup.
Programming Fixed-Code Dip Switch Remotes
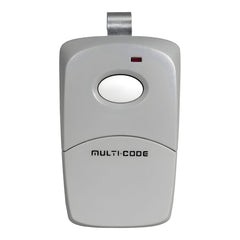
For those using older, but still common, dip-switch gate remotes, such as models from Multicode and Linear, the programming process involves physically matching switch positions. These remotes, recognizable by their rows of tiny switches, offer a straightforward, albeit manual, method of coding.
Here are the general steps for programming dip-switch remotes:
- Locate the Receiver Unit: Find the receiver unit of your gate. This is usually a small box positioned near the gate itself or inside the gate opener housing. Look for a small antenna, which could be a simple loose wire or a coax type.
- Access the Receiver Dip Switches: Identify the small window or compartment on the receiver unit that houses the dip switches. You may need a screwdriver to open this.
- Access the Remote Dip Switches: Similarly, locate the dip switches on your remote. This is often found near the battery compartment.
- Match Dip Switch Positions: The core of the programming is to configure the dip switches on your remote to match the exact pattern of the dip switches on the receiver. Dip switches are usually simple two-position switches (up or down, sometimes marked as on or off).
- Change the Code (Optional): If you wish to change the access code entirely, you can alter the dip switch pattern. In this case, you must change the dip switches to the new desired pattern on both the receiver and the remote.
- Programming Completion: Once the dip switches are matched (or a new code is set on both), the programming is complete for basic gate operation.
After programming, test the remote by standing within range of your gate and pressing the programmed button. If the gate responds as expected, congratulations! You’ve successfully programmed your dip-switch gate remote.
Programming Rolling Code Remotes
Modern gate opener systems often utilize rolling code remotes, which offer enhanced security compared to fixed-code dip switch systems. Brands like LiftMaster are well-known for their rolling code technology. These systems change the security code each time the remote is used, making them significantly harder to duplicate or hack.
Here’s how to program a rolling code remote:
- Locate the Receiver Unit: As with dip-switch remotes, first locate the receiver unit of your gate opener.
- Find the “Program” or “Learn” Button: Look for a button on the receiver unit labeled “Program” or “Learn.” This button activates the programming mode.
- Press the Programming Button: Press the “Program” or “Learn” button on the receiver. An LED indicator light on the receiver should illuminate, signaling that it’s in programming mode.
- Press the Remote Button: Immediately after pressing the receiver’s programming button, press the desired button on your gate remote that you wish to program.
- Programming Completion: In most cases, the LED light on the receiver will either blink or turn off to indicate successful programming.
Again, test your programmed remote. Stand within range and press the programmed button. The gate should respond by opening or closing. If it does, your rolling code remote programming is successful.
Integrating Your Gate Remote with Your Car’s System
Now comes the exciting part: integrating your gate remote with your car. Many modern vehicles come equipped with built-in systems that can learn and operate gate and garage door openers. To utilize this feature, you’ll need to access your vehicle’s programming mode. Consult your vehicle’s owner’s manual for precise instructions on how to do this, as the process varies between car manufacturers and models.
Typically, accessing your car’s programming mode involves pressing and holding one or two of the built-in buttons in your car (often located on the rearview mirror or visor) until an indicator light begins to flash in a specific pattern. In some cases, you might need to erase any previously programmed codes before adding a new one. This is often done by pressing and holding the two outer buttons simultaneously for an extended period, usually around a minute, until the indicator light flashes rapidly.
Programming a Dip Switch Remote to Your Car
If you’re using a dip switch remote, the car integration process is generally straightforward:
- Ensure Remote Functionality: First, make sure the dip switch remote you intend to program to your car is working correctly and can operate your gate.
- Position Remotes: Hold your working dip switch remote close to the built-in button in your car that you want to program.
- Initiate Programming: Press and hold down the button on your dip switch remote and, simultaneously, press and hold the chosen built-in button in your car. Continue holding both buttons until your car indicates successful programming. This indication is usually a change in the flashing pattern of the indicator light.
- Test Operation: Test the newly programmed car button. It should now operate your gate, mimicking your handheld dip switch remote.
Programming a Rolling Code Remote to Your Car (2-Step Process)
Programming a rolling code remote to your car often involves a two-step security process:
- Initial Car Programming: Similar to the dip switch process, start by ensuring your rolling code remote is working with your gate. Then, position it close to the car’s built-in button you wish to program. Press and hold the button on your rolling code remote and the car’s built-in button until the car indicates programming completion (light pattern change).
- Receiver “Learning” Step: After the initial car programming, you need to synchronize the car’s newly programmed button with the gate receiver. Go to your gate opener receiver unit and press the “Program” or “Learn” button, just as you would when programming a new handheld remote. Wait for the LED light to come on, indicating it’s in learning mode.
- Finalize Car Programming: Return to your car and press and hold the built-in button you just programmed in step 1. Hold it until the gate receiver acknowledges the signal, usually indicated by the gate operating or the receiver’s LED light changing.
- Test Thoroughly: Test the car’s programmed button to ensure it reliably operates your gate.
Troubleshooting Common Gate Opener Programming Issues
Even with careful following of instructions, you might encounter issues during the programming process. If you face difficulties, the first and most crucial step is to re-consult your user manuals for both your gate opener and your car. Troubleshooting sections in these manuals are invaluable resources.
Common problems can include:
- Remote Not Syncing: The remote and receiver simply don’t seem to communicate.
- LED Light Issues: The indicator lights on the receiver or car don’t behave as described in the instructions.
- Gate Not Responding: The remote seems programmed, but the gate doesn’t react.
Often, these issues can be resolved by:
- Carefully re-reading and re-following the programming steps. Ensure you haven’t missed a step or performed one out of order.
- Performing a factory reset on either the remote or the receiver (consult manuals for reset procedures). This can clear out any previous incorrect programming attempts and allow you to start fresh.
- Checking battery levels in your remote. Low batteries can cause intermittent or failed programming.
Remember to double-check that you are using the correct programming method for your specific gate remote model and your car’s system. Patience and attention to detail are key to overcoming programming hurdles.
Advantages of Car-Integrated Gate Openers
The benefits of successfully adding your gate remote to your car are numerous and truly enhance daily convenience and security. The most obvious advantage is the elimination of separate remotes. No more fumbling through your glove compartment or searching for a misplaced remote. Your gate control is now seamlessly integrated into your vehicle’s system, always within reach.
This integration also means you always have the necessary control device readily available. As long as you have your car, you have your gate opener. This is particularly useful for households with multiple drivers or for ensuring you never get locked out due to a lost or forgotten remote.
Compatibility Check: Car and Gate Remote System
Before you begin the integration process, it’s wise to consider compatibility. While many modern vehicles offer universal garage door/gate opener systems, not all are universally compatible with every gate remote.
Some vehicles have highly sophisticated built-in systems designed to sync with a wide range of gate remotes. Others might be more limited or may require additional devices or modifications to achieve compatibility.
The best way to ascertain compatibility is to check your car’s user manual. It should specify the types of gate and garage door opener systems that are compatible with your vehicle’s built-in system. If you’re unsure or if your manual is unclear, consulting a professional at a car dealership or a gate opener specialist can provide definitive answers and guide you on the best course of action.
Maintaining Your Programmed Car Gate Opener
Once you’ve successfully programmed your gate remote and integrated it with your car, a little routine maintenance will ensure its continued functionality and long-term performance.
Regular Check-ups for Your Gate Remote
Just like any electronic device, your gate remote benefits from occasional check-ups. Regularly inspect the battery compartment for any signs of corrosion or damage. If you notice any issues, address them promptly to prevent further problems. Replace batteries as needed, and use the correct type as specified in your remote’s user manual. Additionally, clean the remote’s exterior and buttons periodically to prevent dirt and debris buildup, which can interfere with button operation.
Dealing with Battery Problems
Battery issues are the most common cause of gate remote malfunction. If you notice your gate remote becoming less responsive, or if the range decreases significantly, suspect the batteries first. Replace the batteries with new ones of the correct type. Ensure you insert them with the correct polarity. If battery replacement doesn’t resolve the issue, then consider other troubleshooting steps, but always start with fresh batteries as the simplest and most frequent solution.
Conclusion
Programming your gate remote and integrating it with your car is a project that significantly enhances both the convenience and security of your property. By following this comprehensive guide, you can confidently navigate the process, whether you’re dealing with dip switch or rolling code systems. Enjoy the seamless control of your gate from your car, and remember that regular maintenance will ensure continued reliable operation. Happy programming, and welcome to the ease of car-integrated gate control!
Explore our wide selection of gate remotes to find the perfect match for your system: https://elitegates.net/collections/remote-controls