
Bicycle pedals are a critical component, transferring power from your legs to the drivetrain. Understanding how Pedal Threads work is crucial for proper installation, removal, and maintenance. This article provides a comprehensive guide to ensure your pedals are securely attached and functioning correctly.
Decoding Pedal Threads: Righty-Tighty, Lefty-Loosey, But Not Always
The most important aspect of working with bicycle pedals is understanding their unique threading system. Unlike most screws and bolts, bicycle pedals have opposite threading on each side:
- Right Pedal (Drive Side): Standard right-hand threads. This means you tighten clockwise and loosen counterclockwise – the familiar “righty-tighty, lefty-loosey” rule applies.
- Left Pedal (Non-Drive Side): Reverse, left-hand threads. This means you tighten counterclockwise and loosen clockwise – the opposite of the standard rule.
This reverse threading on the left pedal prevents it from unintentionally loosening during pedaling due to the natural precession force.
Pedal Removal: A Step-by-Step Guide
- Secure Your Bike: Use a bike stand for stability. Shift to the largest chainring to minimize the risk of injury.
- Right Pedal Removal: Position the pedal wrench so it’s at a 90-degree angle or less to the crank arm for maximum leverage. Turn the wrench counterclockwise to loosen and remove. Using the opposite crank arm as a lever can help.
- Left Pedal Removal: Position the wrench similarly on the left pedal. This time, turn the wrench clockwise to loosen and remove.
Pedal Installation: Getting it Right
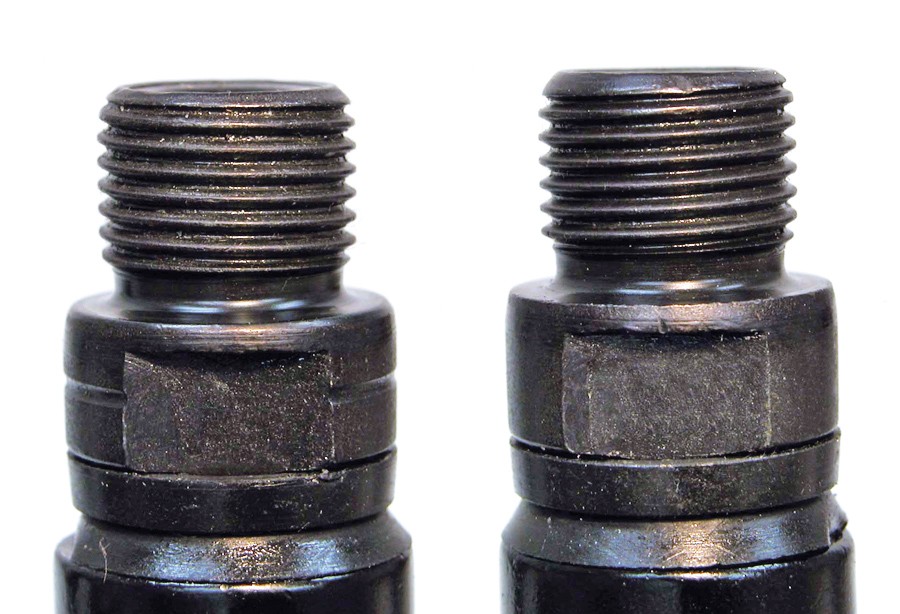
- Identify Left and Right Pedals: Look for “L” and “R” markings. If absent, observe the pedal threads direction: left-hand threads slope upward to the left (left pedal), right-hand threads slope upward to the right (right pedal).
- Grease the Threads: Apply a generous amount of grease to the pedal threads to prevent seizing and ensure smooth installation and future removal.
- Install the Right Pedal: Thread the right pedal into the right crank arm clockwise using your fingers initially. Then, use the pedal wrench to tighten to the recommended torque (around 35-40 Nm or 300-360 in-lb). Pedaling backward can help with tightening.
- Install the Left Pedal: Thread the left pedal into the left crank arm counterclockwise using your fingers. Tighten with the pedal wrench to the recommended torque, using the same pedaling backward technique.
Pedals with Hex Fittings
Some pedals utilize an 8mm hex fitting on the back of the pedal spindle instead of wrench flats. Remember the threading direction remains the same; only the wrench application point changes. Use an 8mm hex wrench and follow the same directional rules for loosening and tightening.
Maintaining Your Pedals
Periodically inspect your pedal threads for damage. If you encounter stripped threads, a tap and die set might be able to repair minor damage. For significant damage, consult a professional bike mechanic for potential solutions like a pedal bushing kit.
Conclusion: The Importance of Proper Pedal Thread Care
Understanding and respecting the unique nature of pedal threads is fundamental for any cyclist. Proper installation and maintenance will ensure efficient power transfer, prevent damage to your crank arms, and guarantee a safe and enjoyable riding experience. Regular inspection and greasing will extend the life of your pedals and bottom bracket, keeping you rolling smoothly for miles to come.