Replacing a Lower Ball Joint on an S-Type Jaguar is not a simple task. Unlike some vehicles that use bolt-in ball joints, the S-Type’s lower ball joint is pressed into the steering knuckle, making the process significantly more complex. This article details the process and offers advice for those considering tackling this repair.
Why Replacing a Lower Ball Joint is Difficult on an S-Type
The pressed-in design of the lower ball joint is the primary reason for the difficulty. It requires specialized tools and a significant amount of force to remove and install the ball joint. This contrasts with bolt-in ball joints found in other vehicles like the Volvo 740, which are considerably easier to replace. While the pressed-in design might offer cost savings in manufacturing, it presents a considerable challenge for DIY mechanics.
Step-by-Step Lower Ball Joint Replacement Guide
The process begins with removing several components to access the lower ball joint:
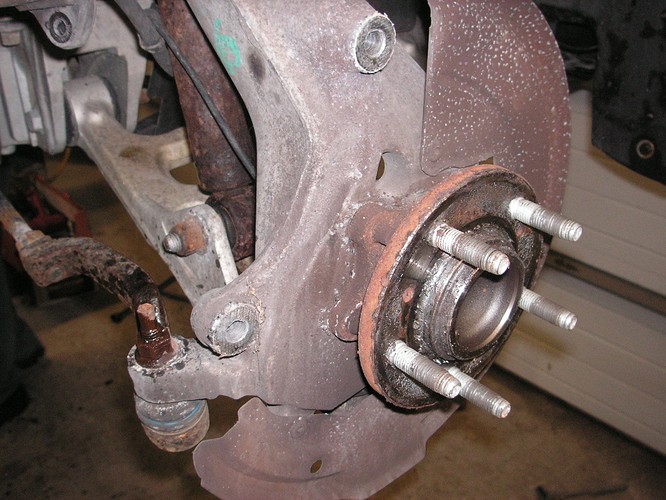
- Wheel, Caliper, Disc, ABS Connection, and Hub Removal: These parts must be removed to gain access to the ball joint. Removing the hub can be difficult if it hasn’t been replaced recently.
- Tie Rod End Disconnection: Disconnect the tie rod end to free the steering knuckle.
- Upper and Lower Ball Joint Nut Removal: Remove the nuts securing both the upper and lower ball joints. The lower ball joint nut typically requires a 22mm and a 10mm wrench.
- Brake Shield Removal: The brake shield obstructs access to the lower ball joint and needs to be removed by drilling out its rivets.
- Removing the Old Lower Ball Joint: This is where the real challenge begins. Due to the tight press fit, significant force is required to remove the old ball joint. Heat application with an oxy-acetylene torch can help loosen the joint for removal. A heavy-duty hammer is also necessary.
- Pressing in the New Lower Ball Joint: Pressing the new ball joint into the knuckle requires a specialized ball joint press or a hydraulic press with appropriate adaptors. Even with the right tools, ensuring the ball joint goes in straight can be difficult.
Recommendations for Lower Ball Joint Replacement
Considering the difficulty of this repair, purchasing a pre-assembled steering knuckle with a new lower ball joint already pressed in is highly recommended. While more expensive initially, it can save significant time and frustration. If pressing in the ball joint yourself, ensure you have access to a hydraulic press or a robust ball joint press with the correct adapters. Using inadequate tools can damage the new ball joint or the steering knuckle. This job is best left to experienced mechanics with the right equipment.