
Upgrading to Lci E60 Headlights is a significant undertaking, but the aesthetic and functional improvements are well worth the effort. This guide details a personal experience of retrofitting pre-LCI E60 headlights to the coveted LCI design, focusing on achieving a high-quality result without breaking the bank. The project aims to enhance the car’s appearance with the modern LCI look, improve lighting performance, and add functional fog lights, all while maintaining serviceability for future modifications.
Understanding the LCI E60 Headlight Upgrade
The LCI (Life Cycle Impulse) update for the BMW E60 brought significant changes to the headlights. Unlike the pre-LCI’s halogen inner flash-to-pass lights, the LCI headlights feature cornering lights that activate under specific driving conditions and steering inputs. This upgrade significantly modernizes the vehicle’s front end and enhances visibility. This retrofit also addresses the lack of fog lights on the M5 by integrating them into the cornering light housing, offering both improved aesthetics and enhanced safety.
Planning and Preparation for the Retrofit
The project began with sourcing two used headlight assemblies from eBay, significantly reducing the overall cost. New aftermarket LCI lenses were purchased to ensure a pristine finish. A crucial step was acquiring a headlight switch with a fog light button (part number 61316925254) to enable fog light control. Wiring diagrams from resources like newTIS and RealOEM were consulted to understand the wiring modifications required for integrating the fog lights with the vehicle’s lighting control module (LM2).
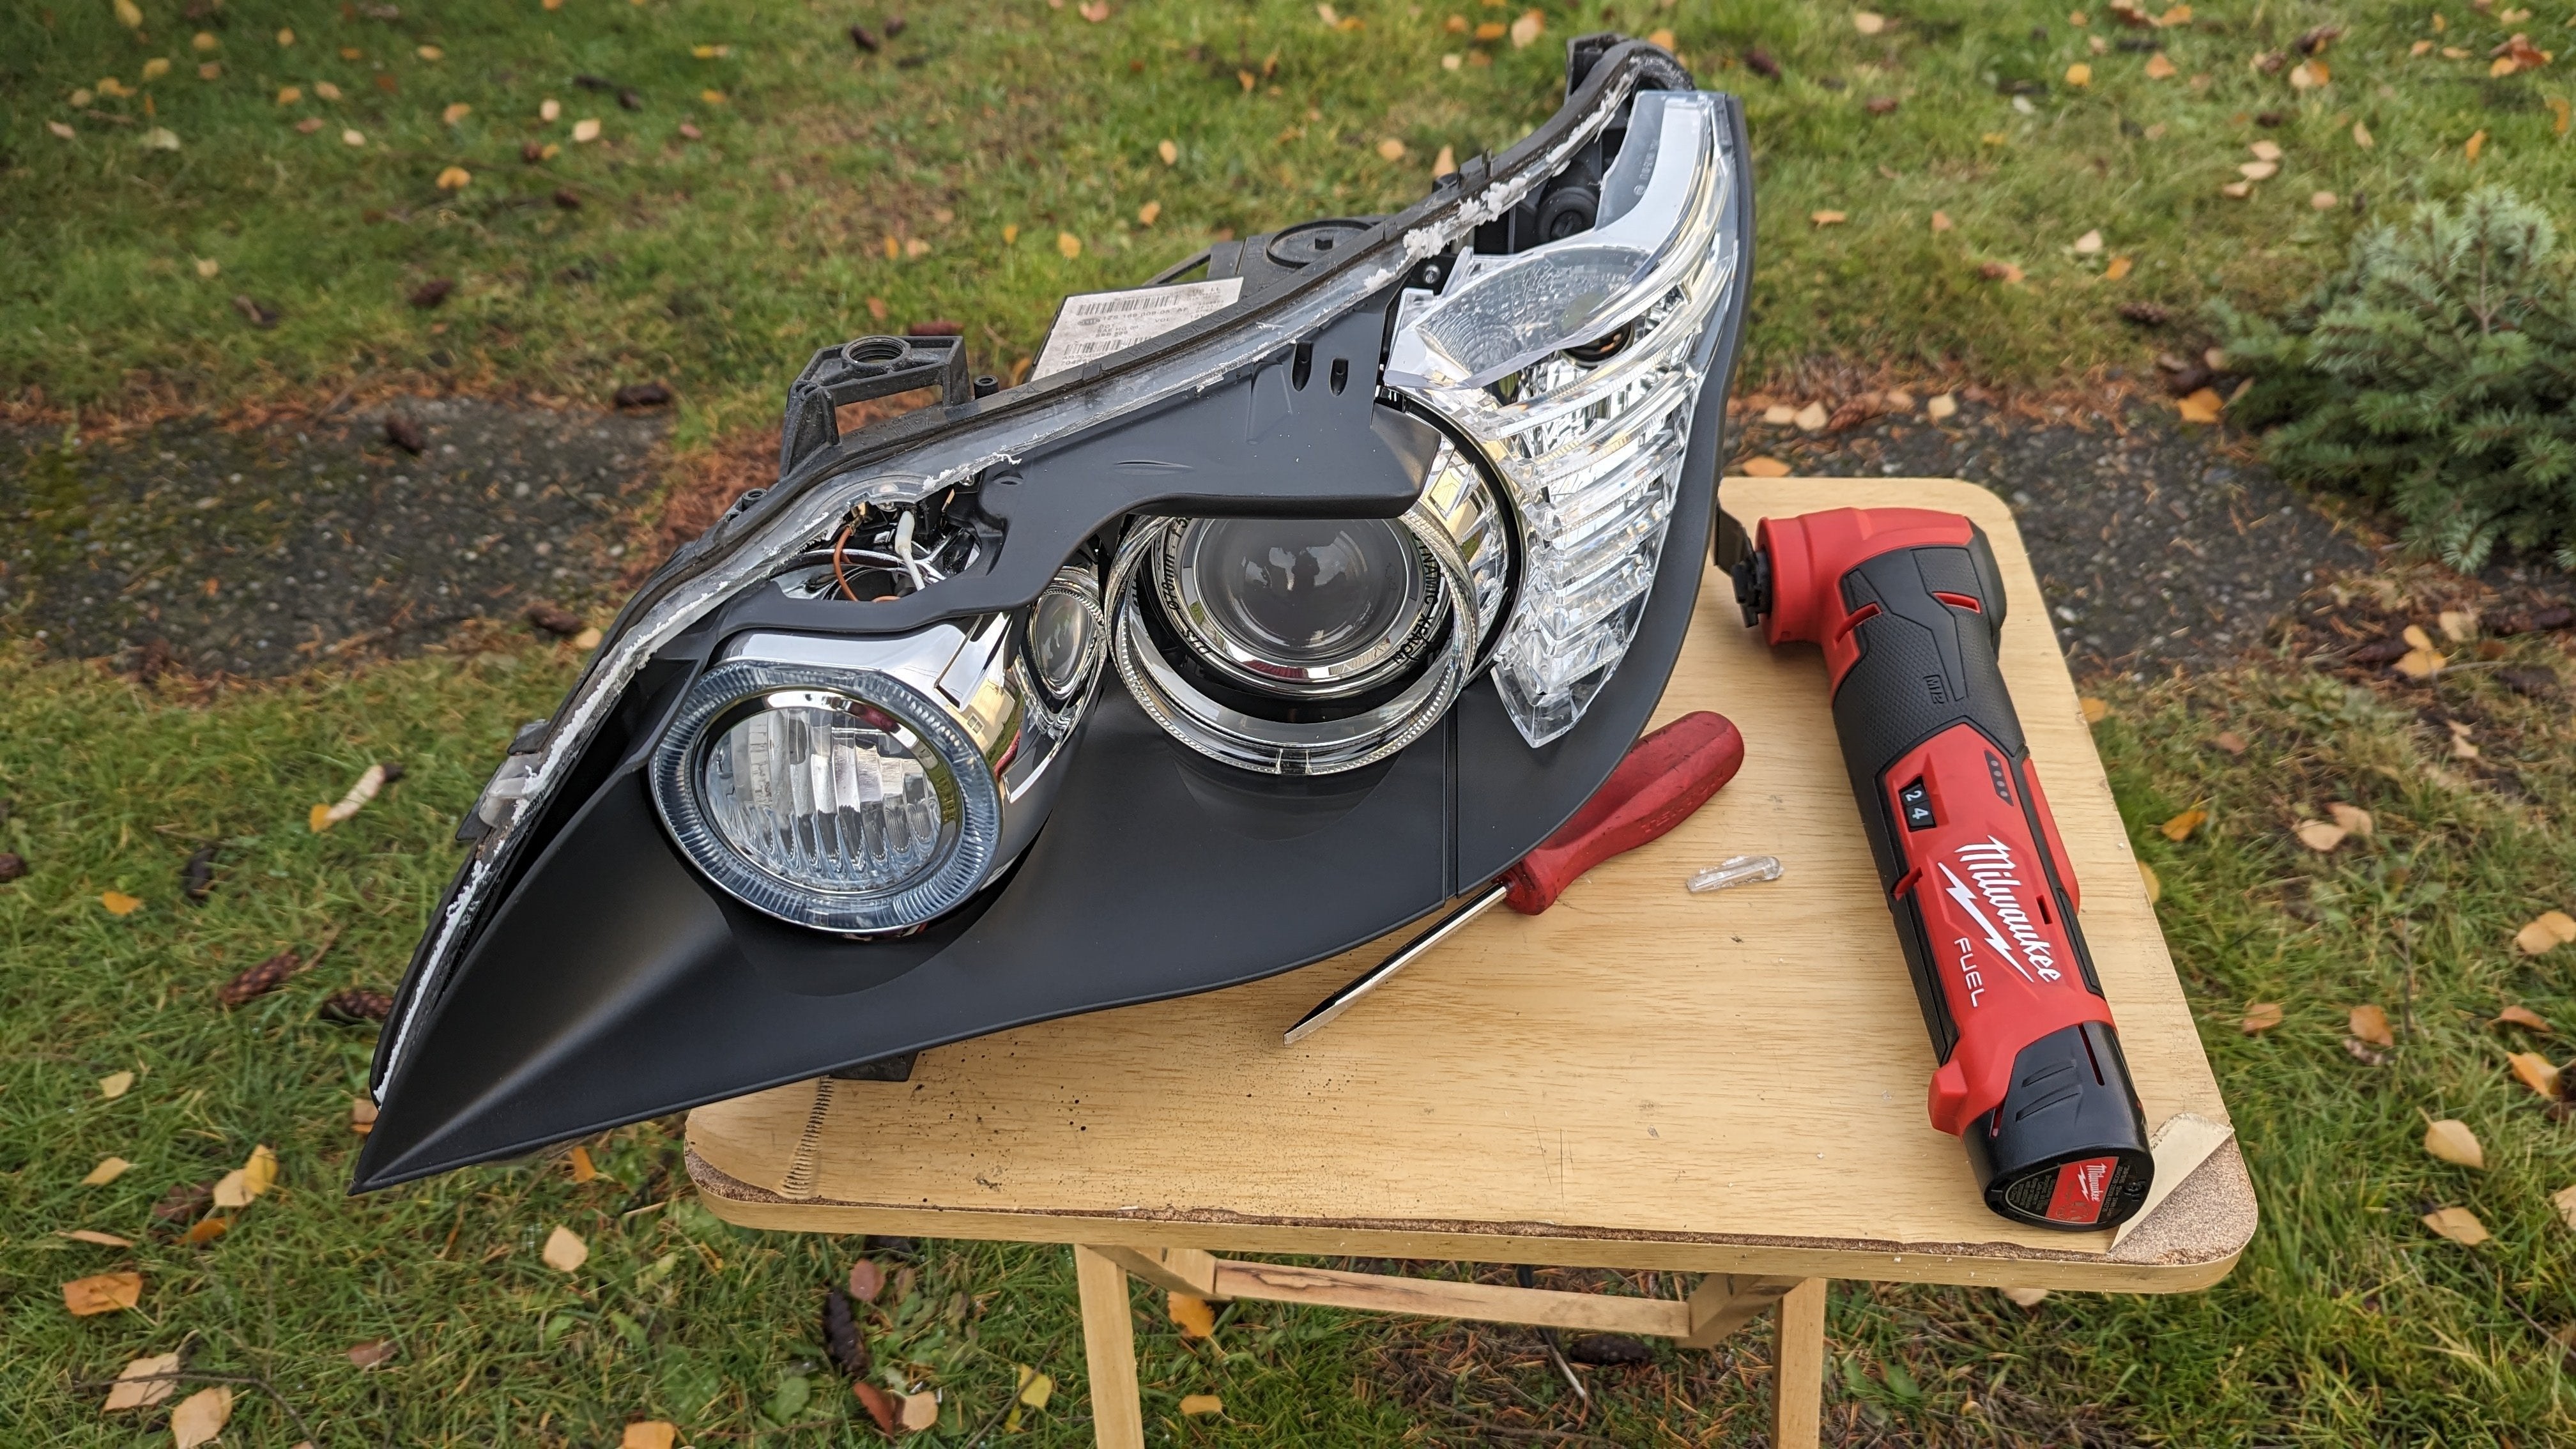
Disassembly and Component Removal
The first step involved removing the old headlight lenses. A specialized cutting tool was used to separate the lenses from the housing, making clean cuts close to the housing edge. The turn signal assemblies, attached to the lenses, were carefully separated and cleaned of excess sealant. The eyebrow, a key styling element of the LCI headlights, was meticulously removed from the old lenses using an exacto knife and preserved for later installation.
After confirming the fitment of the new LCI lenses, the eyebrows were attached using black RTV sealant, ensuring a watertight seal and a secure fit. The headlight housing was further disassembled by removing the shroud assembly, which houses the cornering lights, angel eyes, and shrouds.
Wiring Harness Repair and Projector Modifications
The bi-xenon projectors were removed, allowing access to the headlight wiring harness. The harness was carefully repaired and upgraded with thicker gauge wiring for improved reliability. The AFS (Adaptive Front-lighting System) assembly was also removed, leaving only the high beam shutter control wires connected. A clear lens swap was performed on the bi-xenon projectors to enhance light output. Minor adjustments were required to accommodate the new clear lenses, hinting at further modifications needed for optimal projector performance.
Preparing the Housing for Reassembly
Removing the old permaseal from the headlight housing proved to be the most challenging aspect. After baking the housing in an oven at 250°F to soften the permaseal, specialized removal tools were used to scrape away the residue. This process required multiple heating and scraping cycles to ensure a clean surface for the new lenses to sit flush.
Conclusion and Next Steps
This detailed account of the LCI E60 headlight retrofit highlights the complexities and rewards of such a project. By meticulously disassembling, repairing, and upgrading the headlights, a significant improvement in both aesthetics and functionality was achieved. The project underscores the importance of careful planning, research, and patience when undertaking a complex automotive modification. The journey continues with fine-tuning the projector lenses and implementing the wiring modifications for the fog light integration. Stay tuned for the next installment detailing the completion of this ambitious upgrade.