
IDA Debugger, a powerful reverse engineering tool, is crucial for various cybersecurity roles. This guide provides a comprehensive walkthrough for downloading and installing the free version of IDA on Ubuntu. We’ll cover everything from setting up dependencies to launching the debugger and opening a sample executable.
Why Reverse Engineering Matters
Reverse engineering is the process of deconstructing software to understand its inner workings. This skill is essential for professionals like:
- Incident Responders: Analyzing malware to understand its impact and develop containment strategies.
- Malware Analysts: Dissecting malicious code to identify its functionalities and origins.
- Penetration Testers: Probing systems for vulnerabilities by examining their underlying architecture.
- Vulnerability Researchers: Uncovering software flaws by analyzing code for potential weaknesses.
- Software Developers: Understanding legacy code or competitor products to improve their own software. Mastering reverse engineering tools like IDA is crucial for success in these fields.
What is IDA Debugger?
The Interactive Disassembler (IDA) is a sophisticated software tool that translates machine code into human-readable assembly language. This allows analysts to understand the logic and functionality of a program without access to its source code. IDA supports a wide variety of processors and operating systems, including Windows PE, Mac OS X Mach-O, and Linux ELF executables. It’s considered the industry standard for reverse engineering and debugging. While a commercial version exists (https://hex-rays.com/ida-pro), this guide focuses on the free version.
Prerequisites for IDA Debugger Download
Before you begin, ensure you have:
- An Ubuntu operating system (physical or virtual machine).
- A stable internet connection for downloading the necessary packages.
- If using a virtual machine, a reliable hypervisor.
Installing IDA Free on Ubuntu: A Step-by-Step Guide
Step 1: Install Dependencies
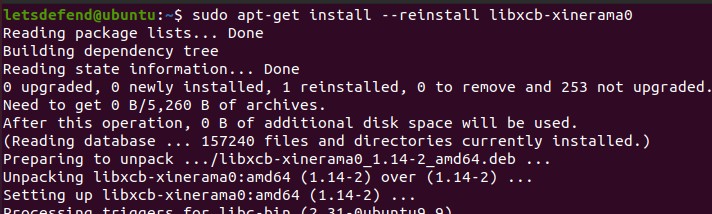
First, reinstall the libxcb-xinerama0 library to prevent potential installation errors:
sudo apt-get install --reinstall libxcb-xinerama0Step 2: Download IDA Free
Download the “IDA Free for Linux” installation file from the official Hex-Rays website: https://hex-rays.com/ida-free/.
Step 3: Grant Execution Permissions
Navigate to your downloads directory and grant execute permissions to the downloaded file:
chmod +x idafree84_linux.run Step 4: Run the Installer
Initiate the installation process:
./idafree84_linux.runFollow the on-screen prompts in the IDA installation wizard.
Step 5: Launch IDA Debugger
Locate the ida64 executable within the installation directory (typically in your home directory under idafree-8.4). Run this executable to launch IDA.
Step 6: Test Your Installation
To verify the installation, open a sample Linux executable like wget:
- Copy
wgetto a convenient location (e.g., your desktop):cp /usr/bin/wget /home/yourusername/Desktop - In IDA, go to File > Open and select the
wgetexecutable.
Conclusion
This guide demonstrated how to download, install, and test the IDA Free debugger on Ubuntu. With IDA successfully installed, you can now begin exploring the world of reverse engineering and delve into the intricacies of software analysis.