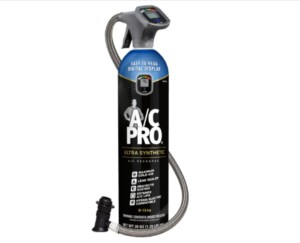
Recharging your car’s AC system used to be a job exclusively for professionals. Now, with readily available DIY kits, you can tackle this task yourself and save money. This guide provides a step-by-step approach on how to recharge your car’s AC safely and effectively.
What You’ll Need:
Before you begin, gather the necessary tools and materials:
- AC Recharge Kit: Choose a kit containing the correct refrigerant for your car (R-134a or R-1234yf). Check your owner’s manual or the sticker under the hood to confirm.
- Safety Gloves and Goggles: Refrigerant can cause frostbite and eye irritation. Protect yourself with appropriate safety gear.
- Pressure Gauge: Most recharge kits include a gauge. This tool is crucial for monitoring pressure and preventing overcharging.
- Thermometer: A thermometer will help you assess the effectiveness of the recharge by measuring the temperature of the air coming from the vents.
Step-by-Step Guide:
1. Determine Ambient Temperature and Pressure Requirements
Do not recharge your AC if the ambient temperature is 55°F or below. Refer to the chart on your refrigerant packaging or consult a repair manual to determine the correct pressure for your car’s AC system based on the current ambient temperature.
Start your car, turn the AC to maximum, and observe the AC compressor clutch. The compressor should engage when refrigerant pressure reaches approximately 25-30 PSI. Using a complete set of manifold gauges is recommended for monitoring both high and low side pressures.
2. Locate the Low-Pressure Port
The low-pressure service port is usually located on the larger AC line near the compressor and often marked with an “L”. Consult your car’s service manual for the exact location. Never use the high-side port for adding refrigerant. R134a fittings are quick-connect, while older R12 fittings screw on. If your car uses R12, it must be professionally evacuated and retrofitted. Do not mix refrigerants. Some vehicles manufactured after 2013 use R1234yf, which is not compatible with R134a.
3. Prepare the Low-Pressure Port
Clean the area around the low-pressure port with a clean rag and remove the cap.
4. Connect the Recharge Kit
Securely attach the hose from the recharge kit to the low-pressure port.
5. Check the Pressure
With the engine running and the AC on maximum, check the pressure gauge. If the pressure is within the normal range, recharging is not necessary, and further diagnosis is required.
6. Add Refrigerant
With the engine running and AC on max, slowly add refrigerant in short bursts while monitoring the gauge and vent temperature. Stop when the pressure reaches the recommended level and the air blowing from the vents is cold (around 35-48°F with an outside temperature of 70-80°F).
7. Disconnect and Store
Remove the charging hose, leaving the can attached. Store any remaining refrigerant in a cool, dry place.
8. Inspect and Reinstall the Service Port Cap
Check the cap seal for damage before reinstalling it. A good seal provides extra protection against leaks.
Common Mistakes to Avoid:
- Overcharging: Adding too much refrigerant can damage the system.
- Ignoring Leaks: Recharging won’t fix a leak. If your AC quickly loses its charge, you likely have a leak that needs repair.
- Using the Wrong Refrigerant: Always use the correct refrigerant for your vehicle.
When to Seek Professional Help:
If your AC doesn’t improve after recharging, or if you suspect a leak, consult a qualified mechanic. Issues like a clogged expansion valve or a failing compressor require professional attention. Persistent warm air after recharging also indicates a more serious problem.

