Imagine the convenience of simply pressing a button in your car to effortlessly open your garage door as you arrive home. Modern vehicles equipped with built-in systems like HomeLink or universal remotes offer this seamless integration, allowing you to control your garage door opener without fumbling for a separate remote. Programming your car to your garage door opener is a straightforward process that enhances your daily convenience and security. This guide will walk you through the steps to program your car to your garage door opener, ensuring a smooth and successful setup.
Before diving into the programming process, it’s essential to understand the components involved and ensure compatibility. Locate the “Learn” button on your garage door opener motor unit. This button, usually near the light bulb or on the rear panel of the unit, is crucial for syncing with your car. If you are unsure of its location, your garage door opener manual will provide specific guidance. It’s also helpful to note down the brand and model of your garage door opener, typically found on a label on the motor unit. This information might be needed to confirm compatibility, especially when using a universal remote system in your car. Garage door openers communicate with remotes using radio frequencies and security codes. Many modern openers utilize rolling code technology, which changes the security code each time the door is used, adding an extra layer of security against unauthorized access. Your car’s HomeLink system or universal remote needs to be programmed to recognize this specific frequency and rolling code to operate your garage door effectively.
For vehicles equipped with HomeLink, programming is generally a quick procedure. Here’s how to synchronize your HomeLink system with your garage door opener:
Step 1: Accessing HomeLink Controls. Begin by sitting in your vehicle with the ignition turned to the “Run” position, or with the engine running. Locate the HomeLink buttons, typically found on the rearview mirror or the overhead console.
Step 2: Initiate Programming Mode. Press and hold the desired HomeLink button until the indicator light starts to blink slowly. This might take approximately 20 seconds. Holding the button clears any previous programming and prepares it for a new signal.
Step 3: Activate Garage Door Opener’s Learn Function. Go to your garage door opener motor unit in the garage and press the “Learn” button. Once pressed, you usually have a limited time frame, often around 30 seconds, to complete the next step.
 Garage Door Opener Learn Button Location
Step 4: Sync HomeLink and Opener. Return to your car and press the programmed HomeLink button twice, holding it down for a couple of seconds on the second press. Watch the indicator light on the HomeLink system; it should transition from a slow blink to a rapid blink. This rapid blinking confirms that the programming was successful and your HomeLink system has learned the garage door opener’s frequency and code.
Step 5: Test the Connection. Press the programmed HomeLink button again to test if your garage door opens or closes. If it operates correctly, the programming is complete. If you have multiple garage doors or gates, repeat these steps for each HomeLink button you want to program.
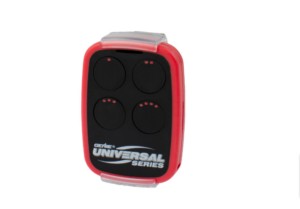
If your car does not have HomeLink but features a built-in universal remote system, the programming process is similar, although specific steps may vary slightly depending on the manufacturer. Consult your vehicle’s owner’s manual for precise instructions for your car’s universal remote. Generally, the process involves these steps:
Step 1: Turn Ignition On. Turn your car’s ignition to the “on” or “Run” position, ensuring the electrical system is active.
Step 2: Simultaneous Button Press. Press and hold the garage door button in your car and simultaneously press the “Learn” button on your garage door opener motor. Some systems might require you to press a specific button combination in your car to initiate the learning process. Look for a light indicator in your vehicle that flashes to signal successful programming.
Step 3: Programming Mode Activation (If Required). Some garage door opener systems may need an extra step. You might need to press and hold the button on your existing garage door remote for about 10 seconds first to put the opener into programming mode, then quickly proceed with pressing the button in your car as instructed in your vehicle’s manual.
Encountering issues during the programming process is not uncommon. Here are some troubleshooting tips to consider:
-
Time Sensitivity: Ensure you are completing each step within the specified time limits, particularly after pressing the “Learn” button on the garage door opener. If you exceed the time limit, you may need to repeat the process from the beginning. Sometimes, successful programming requires several attempts.
-
Specific Procedures: Double-check your garage door opener and vehicle manuals for any brand-specific programming procedures. Certain makes and models might have unique steps or require additional accessories for successful programming.
-
Battery Check: A weak battery in your garage door remote or your car’s system can interfere with the programming signal. Ensure your garage door remote batteries are fresh and that your car’s battery is in good condition.
-
Clear Previous Programming: If you are still facing issues, try clearing any previous programming from your HomeLink system. To do this, press and hold the HomeLink button until the indicator light flashes rapidly for an extended period, then attempt the programming process again.
-
Factory Reset: As a last resort, you can perform a factory reset on both your garage door opener and your car’s HomeLink system or universal remote. Refer to the respective manuals for instructions on how to perform a factory reset. This will erase all settings and allow you to start the programming process from scratch.
FAQ – People Also Ask
How do I determine if my car is compatible with garage door opener programming?
Refer to your car’s owner’s manual or the manufacturer’s website to check for HomeLink or universal remote compatibility and garage door opener programming features.
Can I program my car to operate multiple garage doors?
Yes, many vehicles with HomeLink or universal remote systems can be programmed to control multiple garage doors, as well as gates. Each button can typically be programmed for a different device.
What if my garage door opener brand isn’t listed in my car’s manual?
Even if your garage door opener brand isn’t specifically listed, the standard programming steps often work across various brands. If you encounter difficulties, contact your car manufacturer’s customer support or the garage door opener manufacturer for specific guidance.
Are there safety considerations when programming a car to a garage door opener?
Safety precautions during programming are minimal. However, always ensure the area around the garage door is clear of obstructions and people, and be mindful of moving parts when testing the programmed connection.
Can my car’s HomeLink system be programmed for gates or security systems?
Yes, HomeLink systems are versatile and can often be programmed to operate gates, security systems, and other compatible home automation devices that use radio frequency (RF) or infrared (IR) signals. Check your device’s compatibility with HomeLink for specific instructions.
In conclusion, programming your car to your garage door opener is a valuable feature that adds convenience and security to your daily routine. By following these steps and troubleshooting tips, you can easily integrate your garage door control into your vehicle. Always refer to your vehicle and garage door opener manuals for the most accurate and detailed instructions specific to your models.