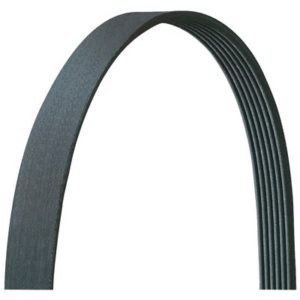
The serpentine belt, a crucial component of your vehicle’s engine, powers essential systems like the alternator, power steering pump, and air conditioning. Knowing how to replace it is a valuable skill for any car owner. This guide provides a step-by-step approach to putting on a serpentine belt, along with essential tips for diagnosis and maintenance.
Understanding the Serpentine Belt Routing
Before diving into the replacement process, understanding how the serpentine belt winds through various pulleys is crucial. Each vehicle model has a unique routing diagram.
1. Consult Your Resources
- Owner’s Manual: This is your primary source for the correct serpentine belt routing diagram.
- Underhood Sticker: Some vehicles have a sticker under the hood illustrating the belt path.
- Online Resources: Websites and forums dedicated to your car model can also provide diagrams.
Steps to Install a Serpentine Belt
2. Gather Your Tools
Having the right tools makes the job easier and safer:
- ½” Breaker Bar or Belt Tensioner Tool: Used to release tension on the tensioner pulley.
- Ratchet and Socket Set: For adjusting the tensioner or removing any necessary components.
- New Serpentine Belt: Ensure you have the correct belt for your vehicle’s year, make, and model.
- Gloves and Safety Glasses: Protect yourself from potential hazards.
3. Release the Tensioner
Locate the belt tensioner, a pulley mounted on a spring-loaded arm. Using the appropriate tool (breaker bar or tensioner tool), apply pressure to the tensioner arm to relieve tension on the belt. This will allow you to remove the old belt.
4. Remove the Old Belt
Carefully slip the old belt off the pulleys, following the routing diagram in reverse. Note the path as you remove it to aid in installing the new belt.
5. Inspect Pulleys and Tensioner
With the belt removed, examine the pulleys for wear, damage, or misalignment. Spin each pulley to check for smooth rotation and listen for any unusual noises. A worn tensioner or pulley can cause premature belt failure.
6. Install the New Belt
Following the routing diagram, carefully thread the new belt onto each pulley. Ensure the belt is properly seated in the grooves of each pulley.
7. Re-engage the Tensioner
Once the new belt is in place, slowly release the tensioner tool, allowing the tensioner to apply the correct pressure to the belt.
8. Double-Check and Start the Engine
Verify the belt is correctly routed and seated on all pulleys. Start the engine and let it run for a few minutes, observing the belt for proper operation. Listen for any unusual noises.
Signs of a Worn Serpentine Belt
Recognizing the signs of a worn serpentine belt can prevent unexpected breakdowns.
- Squealing or Chirping Noises: Often indicate a slipping belt.
- Cracks or Fraying: Visible damage to the belt’s surface.
- Excessive Vibration: Can be a sign of a misaligned or damaged pulley.
- Overheating: A broken belt can disable the water pump, leading to overheating.
Maintaining Your Serpentine Belt
Proper maintenance can extend the life of your serpentine belt:
- Regular Inspections: Visually inspect the belt for wear and tear every few months.
- Keep it Clean: Clean the belt and pulleys of dirt and debris.
- Address Leaks: Oil and coolant leaks can damage the belt.
Conclusion
Replacing a serpentine belt is a manageable DIY task with the right tools and knowledge. This guide provides the essential steps and information to successfully install a new belt. Remember to consult your vehicle’s specific documentation for the correct routing diagram and always prioritize safety. Regular maintenance and prompt attention to warning signs can keep your vehicle running smoothly and prevent costly repairs.

