It’s a sweltering summer day, and you hop into your car, expecting a refreshing blast of cold air from the AC. But instead, you’re met with… warm air? A car AC that’s not working is more than just an inconvenience; it can make driving unbearable. As a content creator for scantoolforcar.store and an auto repair expert, I’m here to guide you through diagnosing and fixing your car’s AC problems.
Before you rush to the mechanic, you can perform several checks yourself to pinpoint the issue. This guide will walk you through common causes of a malfunctioning car AC and provide step-by-step troubleshooting tips, potentially saving you time and money.
Common Reasons Why Your Car AC Isn’t Blowing Cold Air
Several components can contribute to an AC system failure. Understanding these potential culprits is the first step in effective diagnosis.
1. Low Refrigerant Levels
Refrigerant, often called Freon, is the lifeblood of your AC system. It circulates, changes state, and cools the air. Leaks are the most common reason for low refrigerant. Over time, hoses, seals, or components like the condenser or evaporator can develop leaks, causing the refrigerant to escape.
2. Faulty AC Compressor
The AC compressor is the pump that circulates refrigerant throughout the system. If the compressor fails, refrigerant flow stops, and the AC won’t cool. Compressor issues can stem from internal wear, leaks, or a malfunctioning clutch.
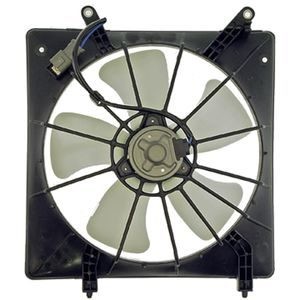
3. Condenser Problems
The condenser, located in front of the radiator, dissipates heat from the refrigerant. Damage, blockage from debris, or a failing condenser fan can reduce its efficiency, leading to poor cooling.
4. Evaporator Issues
The evaporator core is located inside the dashboard and is where the refrigerant absorbs heat from the cabin air, producing cold air. Leaks in the evaporator, although less common than condenser leaks, can occur. Blockages or corrosion can also hinder its performance.
5. Electrical Problems
The AC system relies on various electrical components like fuses, relays, switches, and wiring. A blown fuse, a faulty relay, or a bad pressure switch can prevent the compressor from engaging or other components from working.
6. Cabin Air Filter Clog
While seemingly simple, a clogged cabin air filter restricts airflow to the AC system. This can reduce the amount of cold air reaching the cabin and make the AC seem less effective.
Step-by-Step Guide to Diagnosing Your Car AC
Now, let’s get into the diagnosis. Follow these steps to systematically check your AC system.
Step 1: Preliminary Checks – Is it Really Not Cold?
Sometimes, the issue might be simpler than you think.
- Check the AC settings: Ensure the AC is turned on, the temperature is set to the coldest setting (“Max AC”), and the fan is on high.
- Listen for the compressor clutch: With the engine running and AC on, listen for a click sound from the compressor (usually located at the front of the engine, driven by a belt). This click indicates the compressor clutch is engaging.
- Inspect the condenser and radiator fans: Make sure the cooling fans in front of the radiator and condenser are running when the AC is on. These fans are crucial for airflow and heat dissipation.
- Check for obstructions: Inspect the condenser (in front of the radiator) for leaves, bugs, or debris that might be blocking airflow.
- Cabin air filter inspection: Locate and inspect your cabin air filter. A dirty or clogged filter can severely restrict airflow and reduce AC performance. Replace it if it’s dirty.
Step 2: Checking the AC Compressor Clutch
If the preliminary checks are normal, focus on the compressor clutch.
- Locate the compressor: Find the AC compressor, usually belt-driven at the front of the engine.
- Observe the clutch: With the engine running and AC on, watch the front of the compressor. You should see the center part of the pulley (the clutch) engage and spin when the AC is switched on.
- Clutch engagement frequency: If the clutch engages and disengages rapidly (every few seconds), it’s a strong indication of low refrigerant. The system is cycling on and off due to insufficient refrigerant pressure.
- No clutch engagement: If the clutch doesn’t engage at all, proceed to electrical checks.
Step 3: Electrical Checks for the Compressor
If the compressor clutch isn’t engaging, electrical issues could be the cause.
- Check Fuses and Relays: Consult your car’s owner’s manual or fuse box diagram to locate the AC fuse and relay. Inspect the fuse for breaks and test the relay (you can often swap it with an identical relay for testing purposes).
- Voltage to the compressor: Use a voltmeter to check if voltage is reaching the compressor clutch connector when the AC is turned on. If there’s voltage, the clutch itself might be faulty. If there’s no voltage, the problem lies further upstream in the electrical circuit.
- Pressure switch check: A low-pressure cutoff switch prevents the compressor from running if refrigerant pressure is too low (to protect the compressor). If you suspect low refrigerant, this switch might be the culprit. However, bypassing or jumping this switch for testing should be done cautiously and only if you understand the system.
Step 4: Pressure Testing with Manifold Gauges (Advanced)
For a more in-depth diagnosis, using a manifold gauge set is essential. Caution: Working with refrigerant requires proper equipment and knowledge. If you’re not comfortable, seek professional help.
- Connect the gauges: Connect the manifold gauge set to the high and low-pressure ports on your AC system.
- Read pressure readings: Start the engine and turn on the AC. Observe the high-side and low-side pressure readings. Compare these readings to the specifications in your vehicle’s repair manual.
- Low pressure readings: Consistently low readings on both sides usually indicate low refrigerant.
- Abnormal pressure readings: Unusual high or low pressures on either side can point to various issues like compressor problems, blockages, or expansion valve/orifice tube malfunctions.
Step 5: Leak Detection
If low refrigerant is suspected, leak detection is the next step.
- Visual inspection: Inspect all AC components, fittings, hoses, condenser, compressor, and evaporator (if accessible) for signs of leaks. Look for oily residue, which can indicate refrigerant oil escaping with the refrigerant.
- UV leak detection kit: The most effective DIY method is using a UV leak detection kit.
- Introduce UV dye: Follow the kit instructions to introduce UV dye into the AC system.
- Run the AC: Operate the AC for a while to circulate the dye.
- Scan with UV light: Use the UV light from the kit to scan all AC components, fittings, and hoses in a darkened area. Leaks will appear as bright fluorescent green spots.
- Check common leak areas: Pay close attention to:
- Fittings and connections: Where hoses connect to components.
- Compressor shaft seal: Front of the compressor.
- Condenser and evaporator: Look for damage or corrosion.
- Hoses: Along their length and at crimped fittings.
- Schrader valves: Service ports where you connect gauges.
Step 6: Component-Specific Checks (Advanced)
If leaks are not found or if pressure readings are abnormal, further component-specific checks might be necessary. This often requires more specialized tools and knowledge.
- Condenser check: Inspect for physical damage, blockage, and proper fan operation.
- Evaporator check: Evaporator leaks are harder to detect visually. Sometimes, a musty odor from the vents can indicate evaporator issues. Professional leak detection tools or dismantling the dashboard might be needed for thorough inspection.
- Expansion valve/orifice tube: These regulate refrigerant flow. Blockages or malfunctions can cause cooling problems. Diagnosis often involves pressure readings and sometimes component removal for inspection.
- Accumulator/drier: This component removes moisture from the refrigerant. Saturation or internal failure can affect AC performance.
AutoZone Products to Help You Fix Your AC
AutoZone offers a wide range of products to help you diagnose and repair your car AC:
- Manifold Gauge Sets: For accurate pressure readings.
- UV Leak Detection Kits: To pinpoint refrigerant leaks.
- Refrigerant: R-134a and other types (check your vehicle’s specifications).
- AC Compressors, Condensers, Evaporators, and other components: Replacement parts if needed.
- Cabin Air Filters: Ensure proper airflow.
- Tools: Voltmeters, wrenches, and other tools required for AC work.
(Links to AutoZone products are embedded within the article where relevant and in the original article.)
Conclusion
Diagnosing a “car AC not working” issue can seem daunting, but by following these steps, you can systematically narrow down the potential causes. Starting with basic checks and progressing to more advanced diagnostics like pressure testing and leak detection can often help you identify the problem.
Remember, working with AC systems involves handling refrigerant, which requires care and proper procedures. If you’re uncomfortable with any of these steps or suspect a complex issue, it’s always best to consult a qualified automotive technician. However, with a bit of know-how and the right tools, you can often troubleshoot and even fix common car AC problems yourself, keeping you cool and comfortable on the road.